


How to Troubleshoot Sprinkler Pressure: A Step-by-Step Guide
Last Updated: October 23, 2026
Quick Summary
To troubleshoot sprinkler pressure, start by measuring static and operating pressure at your water source using a pressure gauge, then isolate which zone is affected by running each one individually. A 10-20 PSI drop between static and operating pressure is typical; 30 PSI or more suggests a restriction, leak, or undersized supply line that requires further diagnosis.
Measure static pressure with nothing running and operating pressure with a single zone to identify whether the problem is upstream or inside your system.
A drop of 30 PSI or more between static and operating pressure indicates a restriction, leak, or undersized supply line.
Clogged sprinkler heads are the most common cause of uneven coverage and low pressure in specific areas.
Use your water meter's leak indicator to confirm whether a leak exists before digging to locate it.
Call a professional if pressure is consistently below 20 PSI, you suspect a buried line leak, or the problem persists after checking valves and clogs.
Table of Contents
How to Troubleshoot Sprinkler Pressure: Start Here
How to Check Sprinkler Water Pressure at the Source
What You'll Need
Measuring Static vs. Operating Pressure
Interpreting Your Readings: Benchmarks and What They Mean
Low Pressure vs. Low Flow: Know Which You Have
Diagnosing Sprinkler Zone Low Pressure Issues
Isolating Which Zone Is Affected
Checking Zone Valves and Solenoids
Inspecting Sprinkler Head Clogs and Low Pressure
Visual Inspection and Cleaning
When to Replace Damaged Heads
Sprinkler System Leak Detection and Repair
Step 1: Isolate the Leak to a Zone
Step 2: Confirm with Your Water Meter
Step 3: Locate the Leak
Step 4: Decide, Patch, Replace, or Call a Pro
Common Mistakes to Avoid When Troubleshooting
When to Call a Professional Sprinkler Repair Service
Frequently Asked Questions
How to Troubleshoot Sprinkler Pressure: Start Here
Low water pressure can turn a lush lawn into a patchy mess.
At Talgarden, we help property owners and managers maintain healthy landscapes year-round, and sprinkler systems that aren't performing are one of our most common calls.
This guide walks you through how to troubleshoot sprinkler pressure step by step: measuring pressure, identifying the failing zone, spotting clogs and leaks, and knowing when to call a professional.
How to Check Sprinkler Water Pressure at the Source
The first step in diagnosing any pressure problem is measuring water pressure at the source. You need a baseline reading to know whether the issue is a low supply or a problem inside your system.
What You'll Need
Before you start, gather these simple tools:
A pressure gauge with a hose-thread adapter (analog or digital, both work fine)
A notebook or phone to record readings
A spray nozzle or bucket to direct water if the gauge lacks a bleed valve
Most pressure gauges are available at any hardware store. A peak-hold feature is worth it, it captures the highest reading during a test, which matters when pressure fluctuates.

Measuring Static vs. Operating Pressure
Static pressure is the pressure when nothing is running; operating pressure is the pressure while your system waters. The gap between them tells you more than either number alone.
To measure static pressure, attach your gauge to the outdoor hose spigot closest to where your sprinkler system connects to the main water line. Turn the valve on slowly, read the gauge, and record the number.
Interpreting Your Readings: Benchmarks and What They Mean
Most residential systems deliver adequate PSI at the source. Treat these ranges as a starting point, older neighborhoods and homes on well systems often run lower.
Static Reading | Operating Reading | Likely Interpretation |
40-80 PSI | 30 PSI or higher | Supply is healthy; look for zone-level restrictions |
40-80 PSI | 20-30 PSI | Marginal; check for partially closed valves or a clogged backflow preventer |
40-80 PSI | Below 20 PSI | Significant restriction or leak; isolate the zone before replacing parts |
Below 40 PSI | Any | Weak supply; confirm with your water utility before blaming the irrigation system |
Above 80 PSI | Any | High supply; a pressure regulator may be needed to protect heads and fittings |
The most useful diagnostic is the drop between static and operating pressure. A 10-20 PSI drop when a zone runs is typical; 30 PSI or more suggests a restriction, leak, or undersized supply line.
Pro Tip Always measure pressure at the same location each time. Different points in your system will show different readings. Consistency in your testing location helps you spot real changes versus measurement errors.
Low Pressure vs. Low Flow: Know Which You Have
These are different problems with different fixes. Low pressure means weak spray force, heads barely pop up or spray short distances. Low flow means not enough water volume, heads may have decent force but coverage is thin, or zones starve when two run at once.
A quick test: run a single zone and watch the spray. Heads that pop up fully but cover unevenly point to flow restriction (clogged nozzle, partially closed valve); heads that struggle to pop up point to pressure.
Key Takeaway Record static pressure, operating pressure, and the drop between them every time you test. That three-number snapshot is the fastest way to tell a supply problem from a system problem, and it's the first thing a professional will ask for.
Diagnosing Sprinkler Zone Low Pressure Issues
If overall pressure is good but some zones aren't working, the problem is inside your system. Low pressure in one zone usually means a problem with that zone's valve, solenoid, or line.
Pro Irrigation Training
Isolating Which Zone Is Affected
Turn off your system completely, then manually run each zone one at a time and note which perform poorly. If only one zone is weak, the issue is isolated to that zone; if all zones are weak, the problem is upstream, likely the main valve, backflow preventer, or water supply. For an underperforming zone, open its valve box and locate the solenoid, the small cylindrical device that opens and closes the valve electronically.
Checking Zone Valves and Solenoids
A malfunctioning solenoid is one of the most common causes of low pressure in a single zone, since it may not open fully and restrict flow. First check that the valve is fully open, some zone valves have a manual override screw or lever. Turn it by hand, then test the zone again. If pressure improves, you found a stuck valve.
Watch Out Do not attempt to repair a solenoid yourself unless you're experienced with electrical work. A failed solenoid is an easy fix for a professional but can be dangerous if you don't know what you're doing.
Inspecting Sprinkler Head Clogs and Low Pressure
Clogged or damaged sprinkler heads are the most common cause of uneven coverage and low pressure in specific areas. A single blocked head can reduce pressure to an entire zone.
Visual Inspection and Cleaning
Walk your lawn while the system runs and watch each head. Mark any that aren't spraying, spray weakly, or have an odd pattern with flags or stakes. Turn off the system, dig down to expose each problem head, and remove it (most screw out by hand or with a wrench). Inspect the nozzle opening, sand, dirt, mineral deposits, and debris often clog it.
When to Replace Damaged Heads
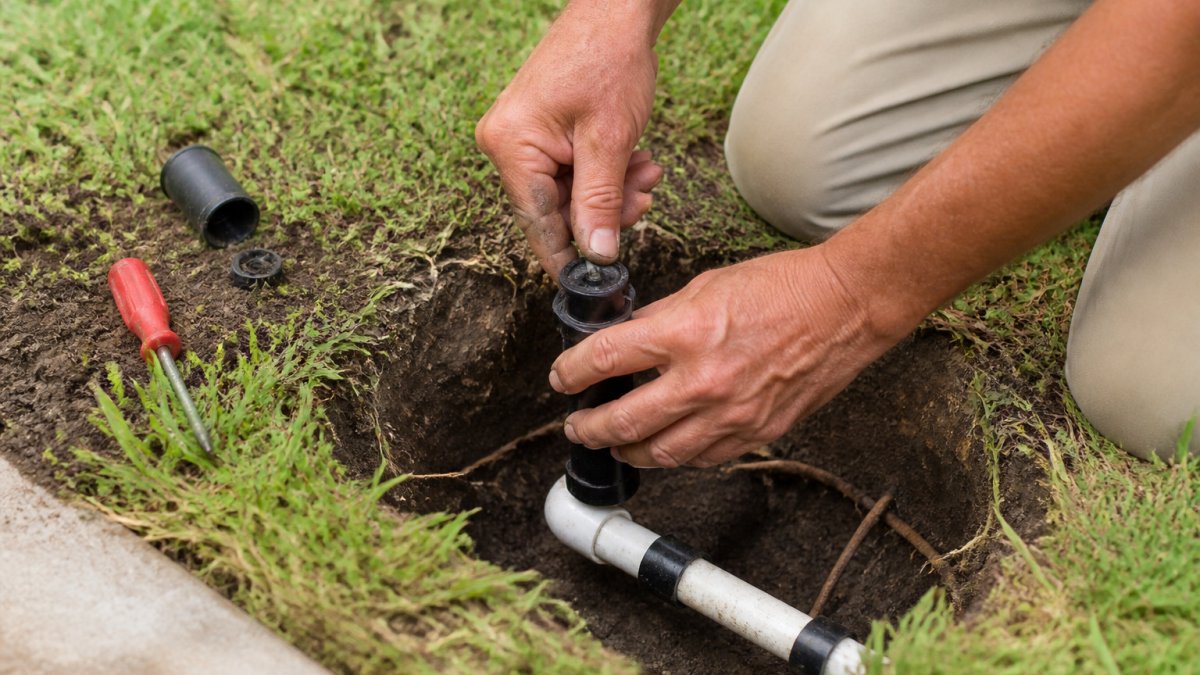
Sprinkler heads don't last forever, wear and freeze-thaw cycles can crack internal components. If a head leaks from the base, sprays sideways, or won't pop up, replacement is usually the only fix. Heads typically take minutes to swap: unscrew the old one, screw in the new one, and test. Match the new head to your existing ones so spray pattern and coverage stay consistent.
Sprinkler System Leak Detection and Repair
Leaks waste water and reduce system pressure, even a small leak upstream of a problem zone can starve it of water. Follow a repeatable process: isolate the leak, confirm it with your water meter, locate it, then decide whether to patch, replace, or call a professional.
Step 1: Isolate the Leak to a Zone
Turn off the system completely. Then run one zone at a time and watch for these signs:
Water pooling in the yard away from head locations
Wet or soggy patches that stay wet after the zone shuts off
A hissing sound under the soil while the zone is pressurized
Write down which zone shows symptoms. If the leak appears only when one zone runs, the problem is on that zone's lateral line. If water pools even when all zones are off, the leak is on the main line between the water source and the valve box, a more serious finding.
Step 2: Confirm with Your Water Meter
Your water meter is the most reliable leak detector you own. Turn off every fixture and irrigation zone, then note the reading on the leak indicator (usually a small triangle or dial that spins when water flows).
Indicator spinning with everything off: you have a leak somewhere on the pressurized side.
Indicator still: no active leak; the pressure problem is likely a restriction, not a leak.
To narrow it further, shut the irrigation system's main shutoff valve (usually near the backflow preventer) and recheck. If the indicator stops, the leak is in the irrigation system; if it keeps spinning, it may be in the home's plumbing, call a plumber, not an irrigation tech.
Step 3: Locate the Leak
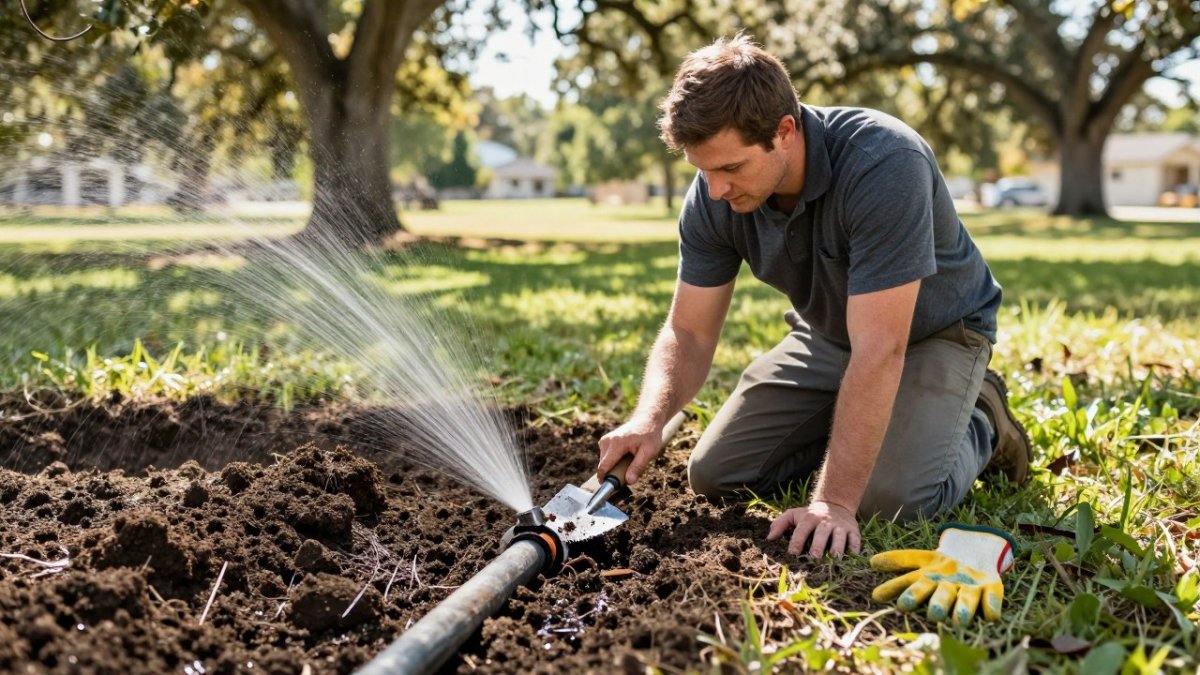
For visible leaks, mark the spot and dig carefully. For hidden leaks, work along the affected zone's lateral line from the valve outward. Buried-line leaks usually show as muddy soil, a soft spot underfoot, or an unusually green patch; a hissing sound under pressure is a strong indicator. Shut the zone off before digging.
Watch Out Call 811 before you dig more than a few inches (811 Before You Dig). Utility lines, gas, electric, communications, are often buried shallower than homeowners expect, and a punctured line is far more expensive than any sprinkler repair.
Step 4: Decide, Patch, Replace, or Call a Pro
Once you've exposed the leak, the repair decision depends on the damage:
Damage Type | Recommended Action |
Pinhole leak or small crack in PVC | Cut out the damaged section and splice in a coupling; patch kits are a temporary fix only |
Cracked fitting or joint | Replace the fitting; PVC fittings are inexpensive and glue together in minutes |
Split along a length of pipe | Replace the full damaged run; patching a long split usually fails under pressure |
Leak at a valve or manifold | Rebuild or replace the valve; do not patch valve bodies |
Leak on the main line before the valves | Call a professional; main-line repairs often require shutting off service and restoring landscaping |
For small pinhole leaks, an irrigation patch kit can work temporarily until a permanent repair. For larger breaks or cracks, the section of line usually needs replacement, where a professional's tools and experience pay off.
Key Takeaway A single leak in a pressurized line can reduce pressure by 10-20 PSI downstream. Finding and fixing leaks is often the quickest way to restore pressure to a weak zone, and the water meter test is the fastest way to confirm a leak exists before you dig.
Common Mistakes to Avoid When Troubleshooting
Many homeowners make troubleshooting harder than it needs to be. Here are the mistakes we see most often.
Testing pressure at different locations. Readings vary by location.
Assuming low pressure means low flow. Low pressure is weak spray force; low flow is insufficient water volume.
Replacing parts before testing. Don't swap a solenoid or head without confirming it's the problem.
When to Call a Professional Sprinkler Repair Service
Some problems are worth handling yourself; others are better left to professionals.
Call a professional if:
Your system pressure is consistently below 20 PSI and you can't find the cause
You suspect a major leak in a buried line
Your backflow preventer needs servicing or replacement
A professional sprinkler technician has diagnostic tools you don't own and can spot problems you might miss, like a failing pump or a misadjusted regulator.
At Talgarden, our team specializes in sprinkler repair and system maintenance.
A weak sprinkler system doesn't have to mean a weak lawn.
Frequently Asked Questions
How do I check the water pressure in my sprinkler system?
Attach a pressure gauge to your outdoor hose spigot or backflow preventer. Turn the water on fully and read the gauge while the system is running (operating pressure) and again with the water off (static pressure). Most residential sprinkler systems operate within a typical range. If your reading is significantly lower, you have a pressure problem that needs investigation.
Can a clogged sprinkler head cause low pressure in the whole system?
A single clogged sprinkler head rarely causes system-wide low pressure, but multiple clogs in one zone can reduce flow and pressure in that zone. If only one zone shows low pressure, check the heads in that zone first. If all zones are affected, the problem is upstream: check your main water supply, backflow preventer, or a leak in the main line.
What should I do if one sprinkler zone has low water pressure?
First, confirm the zone valve is fully open. Then check for clogged or damaged sprinkler heads in that zone and clean or replace them. If the valve appears stuck or won't open fully, it may be faulty. Run water through the zone line at the backflow preventer to test for leaks or blockages. If pressure improves when you bypass the zone valve, the valve itself needs replacement.
How can I tell if a sprinkler pipe is leaking?
Look for wet patches in your yard, especially in lines between zones. Turn off all zones and watch your water meter; if it moves, you have a leak. Dig carefully at suspected leak locations to expose the pipe. Listen for hissing sounds near suspected areas. If you find a leak in an underground line, the section typically needs replacement by a professional to avoid further system damage.
Schedule your estimate today!
Add talgarden.com as a preferred source on Google →
Comments